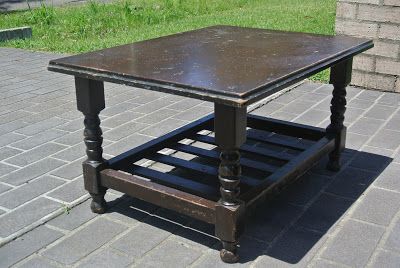
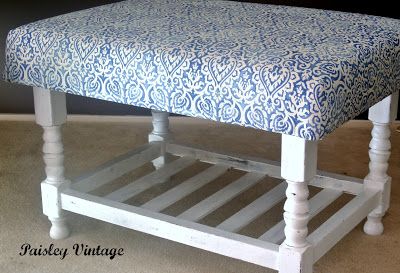
These are one of my most popular pieces at markets, and when I saw this coffee table I knew she'd be great - it's that shelf underneath that's the highlight :) It also has a great 'lip' to attach fabric underneath...
I always paint and finish my base first - I don't want to get paint on my fabric!! Once that's sorted, it's on to the upholstery. I'm no expert by any means, but having done a few now I'm getting the hang of it and am always on the look out for coffee tables that would work well.
Over the top of my foam I put a layer of wading; it's soft and holds everything together. I don't do fancy corners, I just cut them off so they will sit nicely under my fabric.
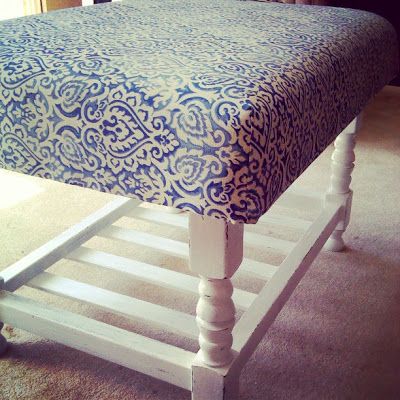
For my corners I like to place the fabric upside down over the top, and pin the corners where I want to sew, remembering tight but not too tight works best. This sometimes takes a few goes to get it perfect, but I think it's worth it. If you don't have a sewing machine, you can always fold the corners like you do when making a bed. You basically end up with a skirt you can slide on and off the top until you get it just right. Once I've got it looking smooth on top I use a staple gun to attach underneath.
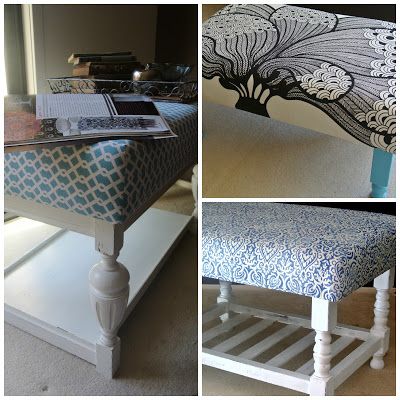
I've done a couple of these now, and honestly I think they are so worth the fiddly bits! My first one, pictured above right, was bought by a lady who wanted it for her entry, and the blue geometric pattern was bought by a lady who was going to use it in her bedroom. I'd love one for my lounge room - a tray, magazines and a bit of extra seating... perfect!
What about you -have you made one yourself? Would you give it a go?
Thanks for stopping by...

I'm sharing at...
TwelveOeight
SugarBee Crafts
Not Just a Housewife
Primp
Miss Mustard Seed
The Shabby Nest
Too Much Time on My Hands
Under the Table and Dreaming
Follow my blog with Bloglovin


I most definitely would love to try one of these. you are the bees knees when it comes to ottomans!
ReplyDeletenext trip to the tip shop I will be on the look out for a manky coffee table to cover.
Bec x
such a great idea!! it turned out fantastic! the top one looks just like the coffee table i finished recently! i will definitely look at little tables differently now - 'could it potentially be an ottoman?!'
ReplyDeletei love the beachy feel of this one! the base is really cool- i can see it stacked with magazines!
ReplyDeleteI love this...it looks fantastic :0)
ReplyDeleteI love your ottomans! You are able to create such neat, tight corners. I also adore having them and I like that they are safe tables to have around little ones who are always falling or bumping into things!
ReplyDeleteThey look fabulous1 I am just about to do a little one out of an old side table to go with a dressing table I am doing!
ReplyDeleteThat looks amazing!! What an awesome job you did. Rachel x
ReplyDeleteHappy Birthday to your little man, Catherine :)
ReplyDeleteI love your ottomans, they look fantastic. I often see gorgeous coffee tables but walk past them as I have found they don't sell that well up here. Maybe I will have to give the ottoman version a try!
xx Karen
I really really love this! I have a few things to re-upholster, but I keep putting it off, because I haven't ever upholstered anything! This makes me want to just jump in and do it!
ReplyDeleteIt turned out great! The blue and white is so pretty and I like that you sewed your corners. I found you via Sugar Bee Crafts. I would love it if you stopped by my home cleaning blog.
ReplyDeleteAngela
to to cute....love it
ReplyDeleteSo creative and cute fabric choice! Come link up to Centerpiece Wednesday and share your post with us.
ReplyDeletehttp://thestylesisters.blogspot.com/2013/03/centerpiece-wednesday-and-wrap-up_26.html
Karin
I would never have thought to turn that coffee table into an ottoman. I will have to remember this idea.
ReplyDeleteHere I see your ideas,It looks so fantastic!!Your suggestions are awesome.Excellent and useful post.Thanks for sharing.
ReplyDeleteUpholstery Cleaning Mansfield TX