Monday, April 23, 2012

Coffee Table Makeover

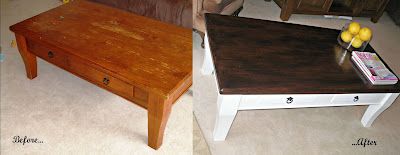
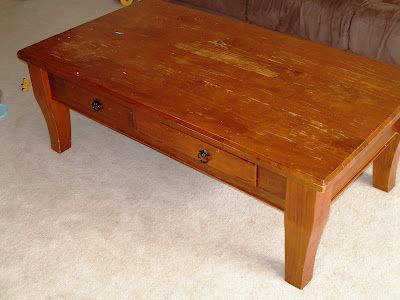
I finally finished a much needed makeover on our coffee table! My husband Danny had this coffee table is his lounge room when I met him - lucky for him I didn't hold it against him. Once we moved in together I moved it all over the house, basically trying to hide it. It's just so orange! In fact, I have a whole herd of orange furniture that are crying out for a makeover. One piece at a time I keep telling myself! Here's how it looked to start with, in all its orange glory.

 photo coffeetablemakeover_zps0c701e01.jpg

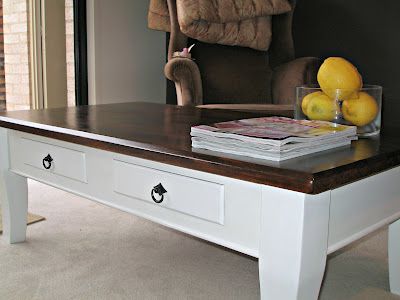
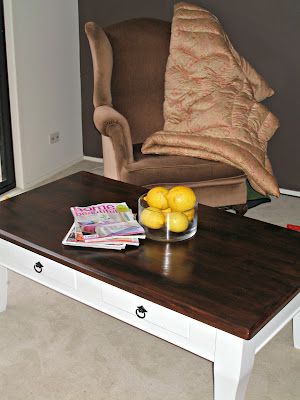
Apart from being orange, the stain was also flaking on the top, and Emma had been practicing writing her name on one corner. When I saw Courtneys' dining table makeover over at The Apprentice Extrovert I knew that was the style I'd go for (and if you don't already follow Court you should - her work is fantastic!). And here it is!

 photo CoffeeTableMakeover2_zps6ac1012e.jpg

The lounge room is on the list for a makeover, but it's a fair way down. Having this table looking good brightens the room and will tide me over for a while... well a little while at least!

 photo coffeetablemakeover3_zps2e503231.jpg

Have you ever worked on a project that made you more and more nervous as you went, because you started to really like it? That was me, with this. I was nervous to keep staining, but I knew I wanted a dark chocolate on top, so I crossed my fingers and kept going. I'm really happy with the result.

 photo CoffeeTablemakeover4_zpsaab6ba3b.jpg

Thank you so much for stopping by!

I'm sharing at
Between Naps on the Porch 
Tip Junkie
Sugar Bee Crafts
Not Just A Housewife
Primitive & Proper
Primp
Domestically Speaking
aka Design

Tuesday, April 17, 2012

Vintage Book Page Magazine Rack


 photo MagazineRack1_zps6a78e0cf.jpeg

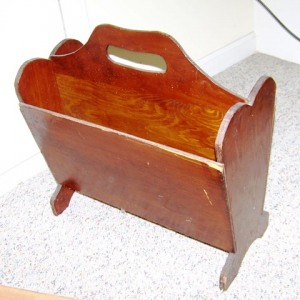
This old magazine rack was actually the very first thing I bought when I found the world of furniture painting. Unfortunately I don't have a before photo, so you'll have to use your imagination a little - it was brown and shiny, with scratches and screws missing. Kind of like this...

 photo MagazineRack2_zps7171c3b1.png

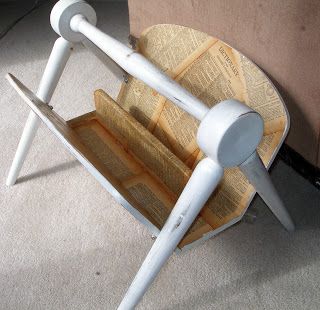
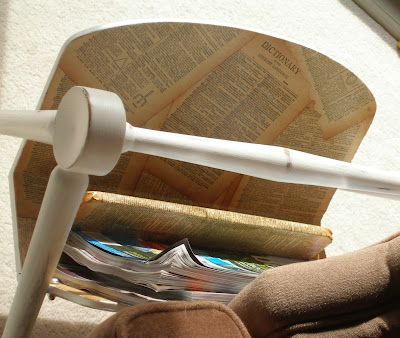
Sounds amazing doesn't it! It was $2 at the Salvation Army, and I thought I could give this furniture painting thing a go. It's seems like forever ago. I painted it white, and then let it sit in the garage while I thought about it a little more. I decided I'd like to try using some old book pages to line it, but when I looked at the old books sitting in my bookcase, I couldn't bring myself to pull them apart! Luckily my Mum has never thrown anything away. ANYTHING. I could do a million posts just on some of the treasures in her home, but today, I'll stay on topic and onto the books she found for me to use.

 photo MagazineRack3_zps3f9db32d.jpeg

The old dictionary is beautiful, with very cute little illustrations next to some of the definitions. In the picture above you can see a 'triangle' and a 'trident'. Cute right? I'm new to Mod Podge, and next time I'll make sure to spread the stuff more evenly, but for my first time around I'm happy with the results.
I'm working on our coffee table at the moment, and when it's finished the rack will take pride of place next to it (I think, we'll see).

I'm sharing at...

Thanks for stopping by.


PS My photography skills are letting me down, and while I'm working on a new camera, I'd love to take better photos. Any suggestions on tutorials or photo tips someone on the blogosphere would be very much appreciated!!


Monday, April 9, 2012

Repurposing - Girls Summer Dress from a Skirt

I've been inspired lately by some amazing re-purposing projects, and during my last visit to the thrift / opportunity shop I picked up a few things I thought might work for summer dresses for Emma. Here's what I came up with...

 photo skirtrepurpose2_zpsf367b9c7.jpeg

The first thing I've tackled is this shirred dress or skirt; I loved the colour and at $2 I thought it would be a great practice run. I actually tried it on myself but it looked terrible. Lets just say I have too much going on for a dress like this!

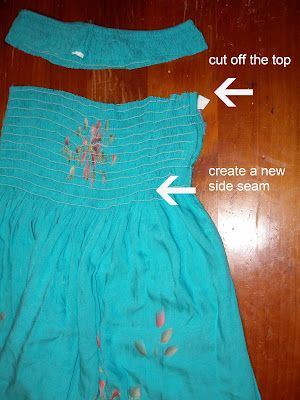
To start with, I laid the dress out on the table and ran a line of pins down one side for a new side seam. The great thing about this style is that the shirring and gathered skirt are quite forgiving - so I went straight down from top to bottom, cut off the excess and then zigzagged over the edges. I thought the top might be a little big, so I cut some off the top and then zigzagged the edges.

 photo skirtrepurpose3_zps8a4ddaa8.jpeg

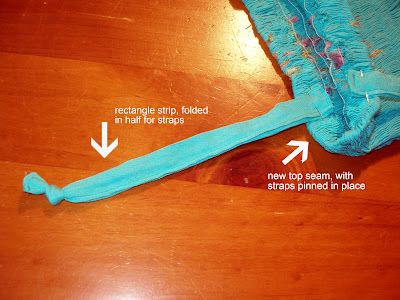
From there I hemmed the bottom and created some straps from the excess material. The straps are simple rectangles of fabric, but I also thought about using ribbon or braid (I probably would have gone for some ribbon if I had some in the right colour, but I was trying to stick to a very limited budget, so I went with the material straps).

 photo skirtrepurpose4_zps3e73b602.jpeg

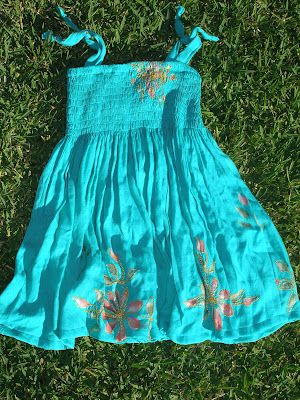
And here is the finished product! Not bad for $2!!

 photo skirtrepurpose5_zpsd6b4dfe9.jpg

For me, the hardest thing was cutting into an already complete garment. But once I started it was so quick - when you're working with something that is already basically constructed there are much fewer steps than if you were starting from scratch. I'm a bit keen to start on the other dress now, and to think about what I might find for Harry (and me too!).

I'm sharing at...
The Habby Goddess' Make Grow Thrift,
Not Just a Housewife
Live Laugh Rowe
The Train to Crazy 
The Shabby Nest 
Sew Many Ways


Thanks for stopping by!

Tuesday, April 3, 2012

A Magical Forest Table

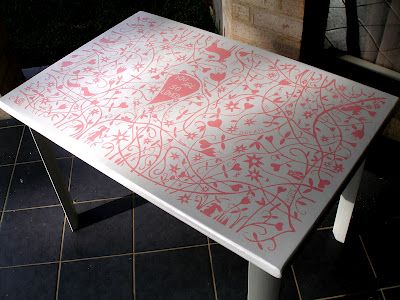
A magical forest table for Emma's room...

 photo magicalforesttable_zps9bfa8a99.jpeg

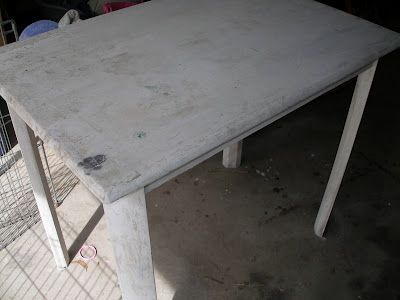
I'd been looking for a little desk for Emma's room on every street and in every thrift / op shop. In the rain I saw this table sitting on top of an old lounge chair and knew I could make it just right. (Ok, so actually I thought that I could have a go and if it didn't work out I hadn't spent any money!)

 photo magicalforesttable2_zps10e6936c.jpg

As always, it was dirty. It had a clump of hair / dust / gunge that made me want to heave. But that's not unusual right? Being thrifty isn't always glamourous! After sawing the legs down to the right height I sanded, primed and painted the table white. I knew immediately what I wanted to do - I love Rob Ryan's amazing papercuts, but can't quite afford it right now. So I worked on a design of my own.

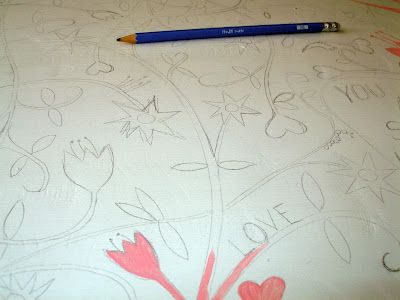
 photo magicalforesttable3_zps86bf6467.jpeg

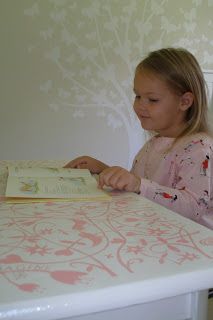
I drew the design on in pencil first, which made it easy to rub out anything that didn't look quite right. And I had some help along the way - both Emma and Harry loved drawing on the table and then rubbing it out. Every morning Emma has raced out to see what I've painted over night, so we've been playing games finding animals and words already. I'll be honest - painting the design took hours, but I think it was well worth the effort, and Emma does too! My favourite is that little girl with pigtails, my Emma.

 photo magicalforesttable4_zpsce32deab.jpeg

This table will sit under Emma's gallery wall in her room. No styled photos at this stage, I'll save them for when her room is finally finished.

 photo magicalforesttable5_zpsfce7e9e1.jpg

Thank you for stopping by - I'd love to hear what you think.

I'm sharing at Not Just a Housewife, Sugar Bee Crafts, Domestically Speaking, Tatertots and Jello, Primitive & Proper, The Shabby Nest, Miss Mustard Seed , Under the Table & Dreaming & aka design .

Related Posts Plugin for WordPress, Blogger...